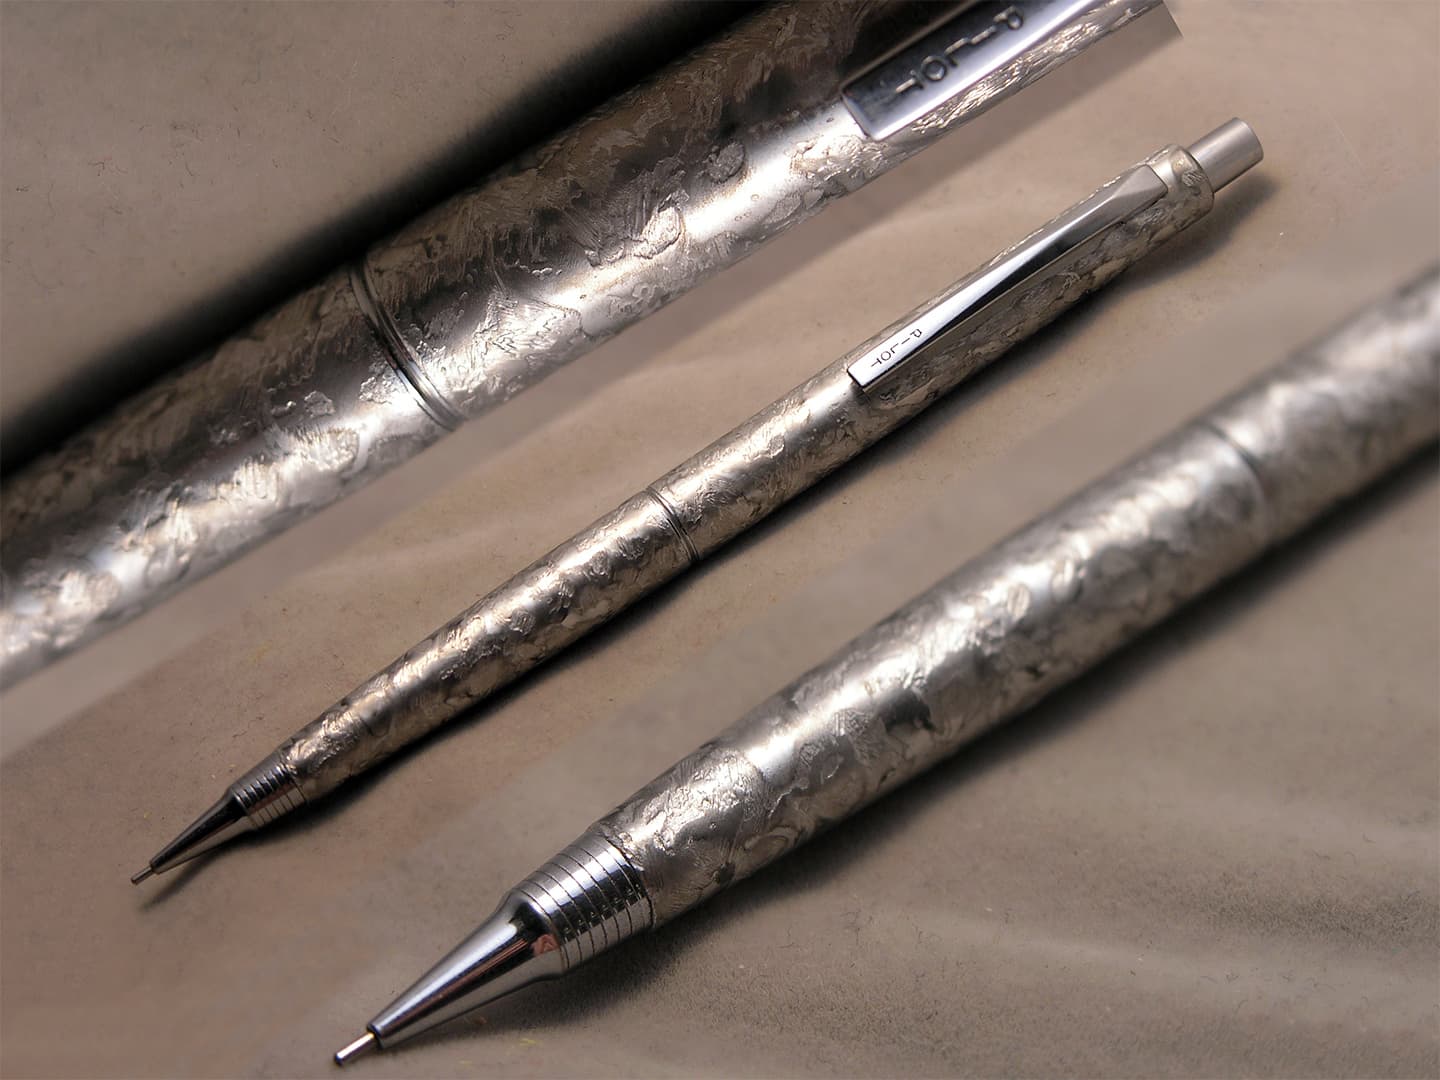
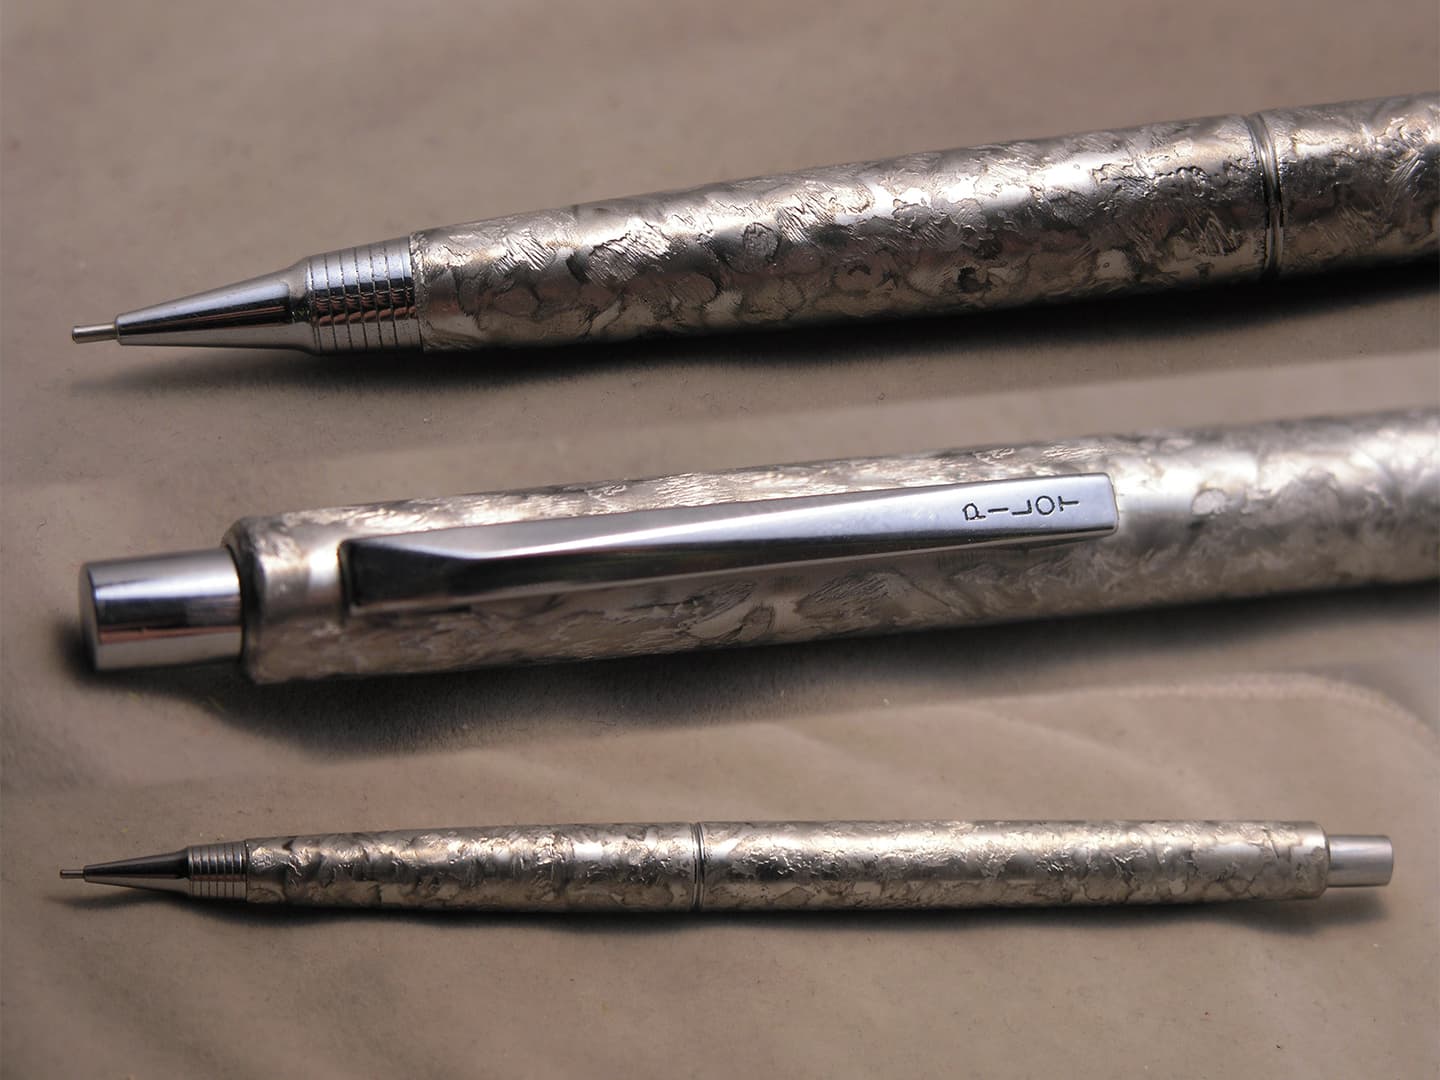
One day I was going through a bag of mechanical pencils that were superfluous, had been extras alongside pencils I’d really wanted. One of them was this PILOT MP of rather ordinary stature. It’s like about 5 other models that have been made. This one featured a satin finish of an aluminum alloy. It looked pretty nice… when it was new. This one had a few nasty scratches on it. They were in such a way that there wasn’t a possibility to correct it. And the pencil wasn’t so coveted that I’d want to invest in that. What could I do?
And that’s when it hit me. Why not abrade it? Intentionally scuff/scratch/mar the finish. I experimented a little in one spot using a dremel with a brush grinder wheel, then kind of got a random motion going. I taped up the clip and kept going. Eventually, I stopped. Not bad! I decided to make another run across it, to “average out” the abrasions. Maybe it might start looking like an intentional design rather than, “behold my pencil that survived a tornado!” What really made this work was the serendipity of the alloy. While firm, the metal would soften a little under repeated rapid abrasion. Not quite like clay, but it definitely seemed to soften under duress. I think that helped create this rather interesting finish:
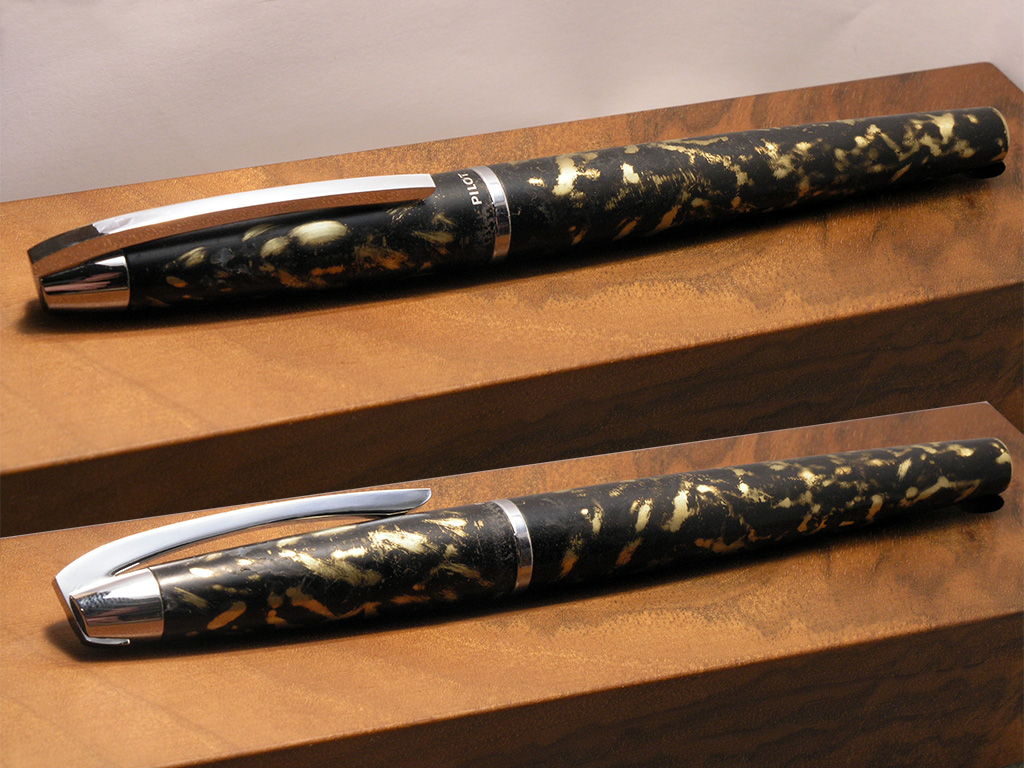
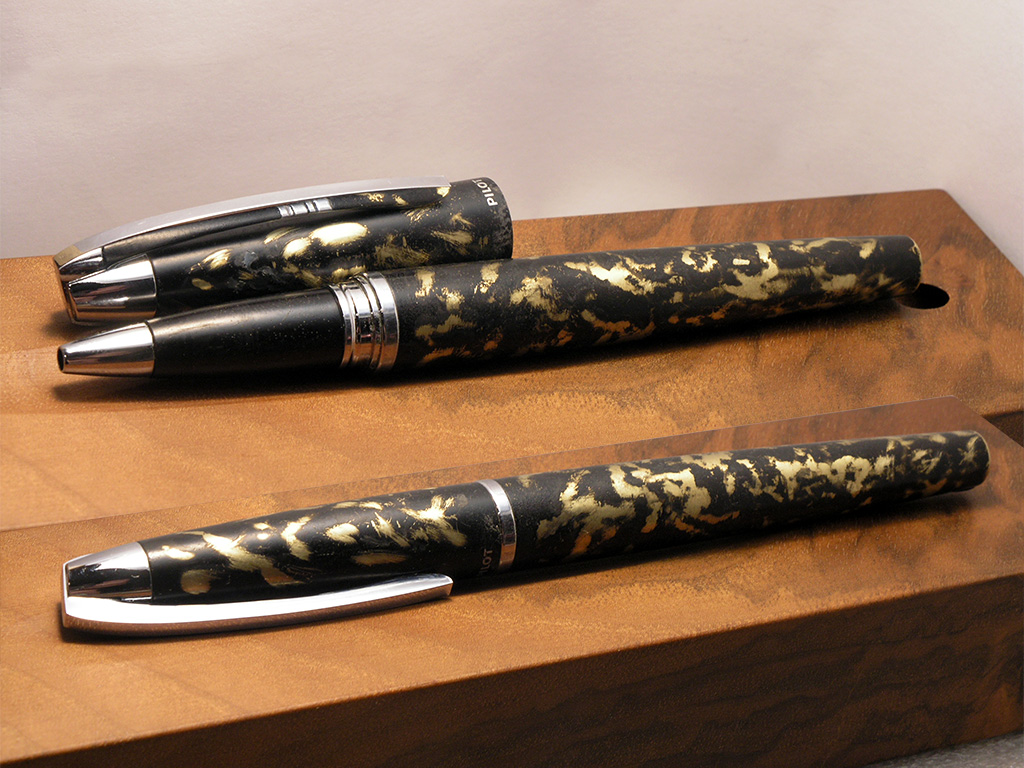
So then, I had this PILOT Knight capped rollerball I’d bought rather cheap. It was used with some of the black body rubbed off in spots. Wabi-sabi. Then while fidgeting with it, my thumbnail caught a lip of a chip and subconsciously started fiddling it. It widened. Now, it looked a bit of an eyesore. So I used a Sharpie. That worked initially but didn’t last. Then, I used some Testors enamel paint. That worked longer, but still… not enough.
Of course, this was different from the pencil. The Knight is a brass bodied writing instrument with an anodized exterior (silver and black are the colors, possibly more). In this case, I did the abrading differently. I was tempted to try imitating leopard spots, but thankfully I nixed that idea before it was too late. This was fun. And the pen now has so much personality!
I love this! I have a real affinity for this sort of thing. I take pleasure in adding a personal touch to things. While precision and automation are wonderful, there’s a certain magic in the touch of a hand.
Thanks, Stu! You’re welcome. There are so many different Dremel bits you can experiment with. First I chose one of those sandpaper like conical bits. But I found the wire brush wheel was more effective. I imagine this whole genre is ripe for exploring. And frankly, if a damaged pen or pencil can be had on the cheap, this is a good reason to pick it up.
I’m very curious…
Has anyone here come across the first PILOT I posted in this topic? It’s the abraded one I modified. Notice the nose cone has 7 inscribed rings on it. The body is all aluminum alloy… not brushed stainless steel. When I originally got this one in a random vintage pencil lot, the body had a number of small nicks and scratches in it, and I discovered they couldn’t be polished out. So that’s when I decided to experiment with abrading it. I really like the result and thought about doing it again, but I’ve not come across more examples of this model.
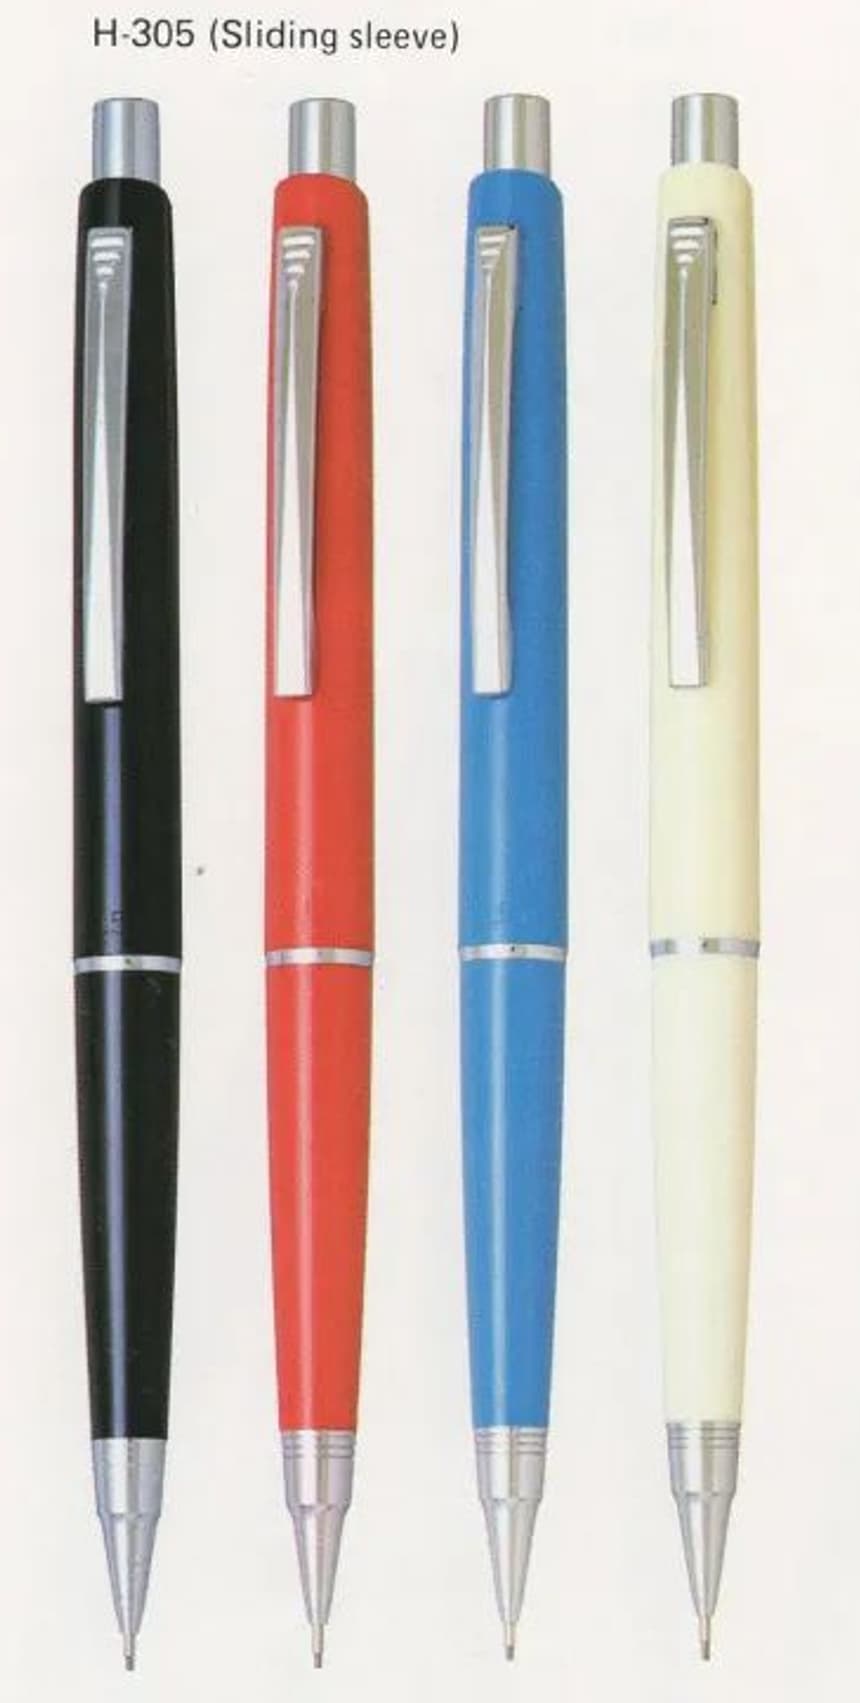
This is a ubiquitous piece that has had at least 2 iterations over the years—one version has a smooth clip (like yours), and later versions have crimping at the top of the clip (as seen on page 10 of the 1988 Pilot catalog).
My specimen has some scratching near the barrel joint and damage to the end cap. It looks a helluva lot better with the abraded finish!
Yes, the H-305 seems to be pretty close, but has that clip with the crimped/stepped segment at the top and the nose cone having 4 engraved rings instead of 7 rings. I’m guessing mine is from early 1980’s, or possibly even late 1970’s.
Yes, they’re not quite the same, but the closest I could find in terms of nose cone shape. Do you have multiple 7-ring examples in your collection? Are they all the same model / body-type, or have some slight differences (e.g. clips)? And you mentioned the clip – that does seem like a 1970’s design that was used on a number of other models, including the clutch point ones with stepped bodies (aluminum, striped, and window grid).
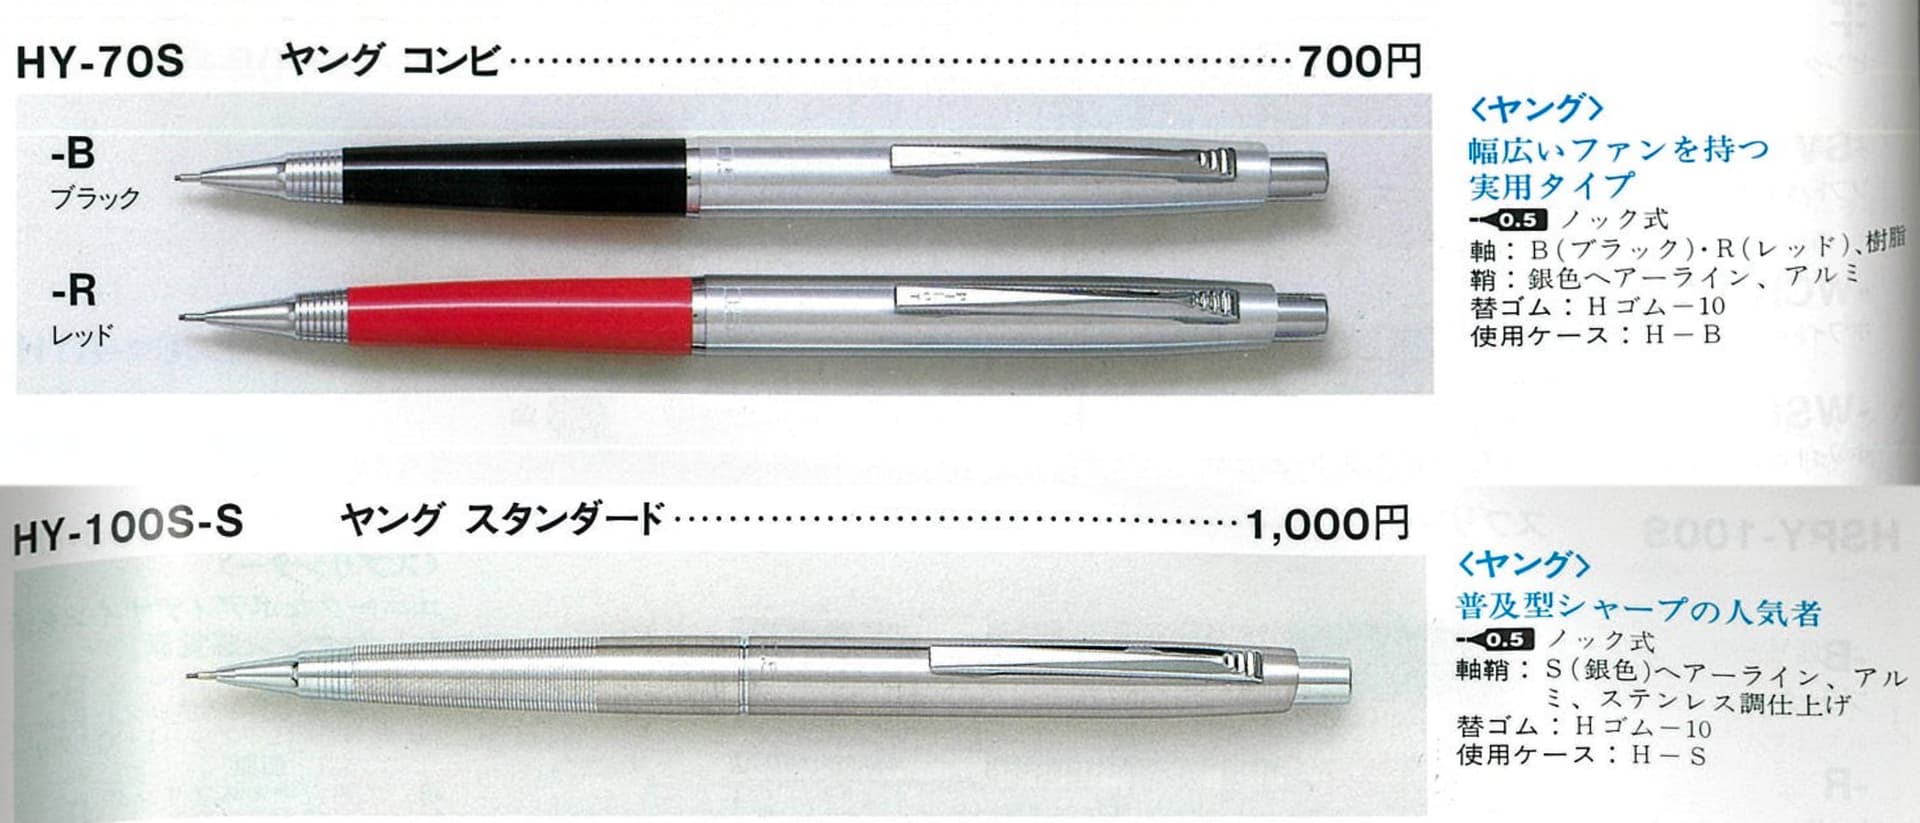
I wonder what significance was behind the nose cone rings, or if it was just a random whim of the designer. In that 1988 catalog, it just so happens there are some 7-ring examples… model number HY-70S, priced at ¥700. Coincidence? They’re all 0.5 mm.
There’s an HY-100S priced at ¥1000 and it has 5 rings. This model looks closest to the one I abraded, except for the clip (which looks like it must’ve come from the early 1980’s or late 1970’s).